
What Is Venipuncture?
Venipuncture (sometimes referred to as venapuncture, venepuncture or even venu puncture) is the collection of blood from a vein which is usually done for laboratory testing.
How many steps are there in drawing of blood by venipuncture for human blood Chemistry Panel & Complete Blood Count (CBC)?
20
What steps are required for drawing of blood by venipuncture for human blood Chemistry Panel & Complete Blood Count (CBC)?
Practice Universal Precautions using gloves, eye protection, and lab coats.
Always use sterile, single-use, disposable supplies for sample collection.
Venipuncture procedure
| 1. |
Patient Position: Supine (laying down) position is preferred, flat on the back with both ventral (front) surfaces of the arm up. Patient can sit in a comfortable, sturdy chair with a stable arm rest. The arm is turned with the ventral surface up. NEVER allow the patient to sit upright on a high stool or standing due to the possibility of syncope (fainting). Make sure participant is sitting comfortably. |
| 2. | Lay out all blood collection supplies and necessary labels. Assemble needle or butterfly needle into Vacutainer holder being sure that it is firmly seated into threads. Loosely place Vacutainer tube into holder, but do not puncture top. |
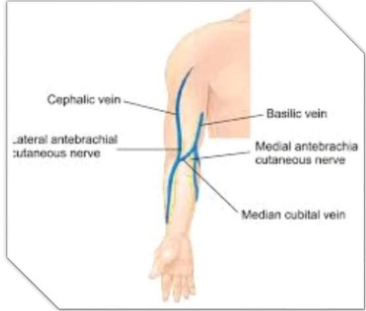
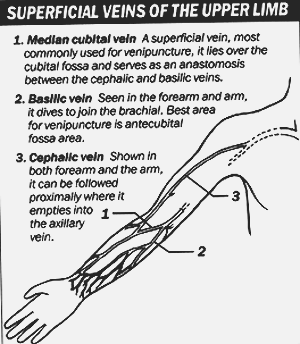
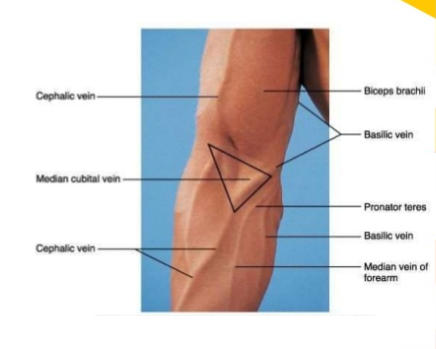
| 3. | Examine both arms to find
the best vein. Locate the
puncture site; apply the
tourniquet.


|
| 4. | Locate the vein and cleanse the area with an alcohol wipe. Wipe the area in a circular motion making sure the area is thoroughly cleaned. Repeat with a second wipe, if necessary. |
| 5. | Dry with gauze. |
| 6. | If it is necessary to feel the vein again, do so, but cleanse the area again with an alcohol wipe and dry with gauze. |
| 7. | Fix the vein by pressing down on the vein about 1 inch below the proposed point of entry and pull the skin taut. |
| 8. | Remove the needle shield. |
| 9. | Approach the vein in the same direction the vein is running, holding the needle so that it is at an approximately 15° angle with the participant's arm. |
| 10. | Push the needle, with bevel facing up, firmly and deliberately into the vein. Activate the vacuum collection tube by pushing the tube onto the needle and puncturing the tube top. If the needle is in the vein, blood will flow freely into the tube. If no blood enters the tube, probe for the vein once or twice until entry is indicated by blood flowing into the tube. |
| 11. | For collection, loosen the tourniquet immediately after blood flow is established and release entirely as the last tube fills. |
| 12. | If a syringe is required to obtain the blood, attach it to the appropriate size butterfly needle and withdraw 2-3 mL blood. After withdrawing the needle from the arm, quickly change the needle on the syringe and transfer blood from the syringe by puncturing the top of the tube with the new needle and allowing the vacuum to draw the blood into the tube. Mix well with the anticoagulant. |
| 13. | Withdraw the tube, then the needle. Heavy pressure as the needle is being withdrawn should be avoided. |
| 14. | When the needle is out of the arm, press gauze firmly on the puncture. |
| 15. | Have the participant raise his arm (not bend it) and continue to hold the gauze in place for several minutes. This will help prevent hematomas. |
| 16. | Report to the supervisor any reaction experienced by the participant during the venipuncture procedure. |
| 17. | Place a bandage on the participant's arm. |
| 18. | Label all tubes with the preprinted labels provided. Write date on label with permanent marker (if not preprinted). |
| 19. | You may resheath the needle, but only with proper technique. With the needle top on the absorbent pad, slowly slide the needle into the needle top. |
| 20. | The needle should be discarded into a sharps container. Place all labeled tubes in a cool box, and discard waste into biohazard container. |
Medical Technologist
https://www.qureshiuniversity.com/medicaltechnologist.html
Medical Assistant
https://www.qureshiuniversity.com/medicalassistant.html
https://phlebotomycoach.com/faqs/what-is-venipuncture