
| Admissions | Aircraft | Aviation World | Ambassadors | Accreditation | A to Z Degree Fields | Books | Calendar | Catalog | Colleges | Contact Us | Continents/States | Construction | Contracts | Distance Education | Emergency | Emergency Medicine | Examinations | English Editing Service | Economy and budget | Forms | Faculty | Governor | Grants | Hostels | Honorary Doctorate degree | Human Services | Human Resources | Internet | Investment | Internship | Login | Lecture | Librarians | Languages | Manufacturing | Money transfer(Pay Now) | Membership | Observers | Profile | Public Health | Publication | Professional Examinations | Programs | Progress Report | Recommendations | Ration food and supplies | Research Grants | Researchers | Students login | School | Search | Software | Seminar | Study Center/Centre | Sponsorship | Tutoring | Thesis | Universities | Work counseling |
01 Do I need to charge my camera’s battery?
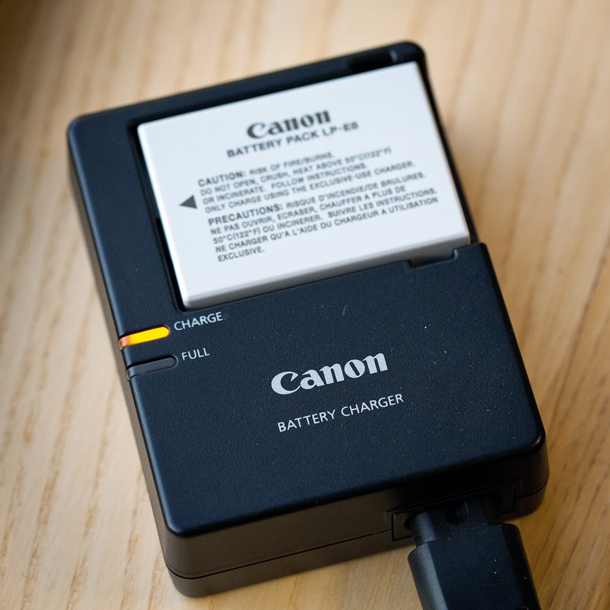 Yes. A new DSLR will have a battery that’s only partly charged, but to avoid ending up with a dead battery at a key photographic moment, we’d recommended charging it fully before you start to play with your new camera. Pop it in the charger, the light on the charger will flash when your battery is charging, and will turn solid green when fully charged. It normally takes around two hours to fully charge a completely flat battery. To see how much charge is remaining in your battery, check the little battery icon on your camera’s LCD – it will flash if it’s nearly flat. We’d recommend buying a spare battery as well – your manufacturer’s official batteries are best, but expensive; Hähnel also does good batteries that are half the price and offer reliable performance too. •See also our tips for extending the life of your camera battery 02 Which memory card do I need? Different DSLRs use different memory cards – either CompactFlash (CF) or Secure Digital (SD, SDHC or SDXC, depending on capacity). Consumer DSLRs use SD cards; prosumer models use CF cards; while the latest pro cameras take both CF and SD. As camera megapixels increase, so do image file sizes, which means you’ll need bigger memory cards. We advise using between 8GB and 32GB cards with speeds around 400x or 45MB/s for faster writing (to your card) and downloading speeds (to your computer). The higher capacity and faster the cards, the higher the price. When you’ve downloaded your shots, we’d always suggest you format each card you put into your camera before shooting again to ‘wipe it clean’ so it’s empty and ready to store new images. This is done easily via your camera’s menu system. 03 How do I change lenses without damaging my camera? As you improve and take more chances with your photography you’re probably going to want to take off your standard kit lens that came with your camera and try another optic. Below we show you step-by-step how to change lenses safely. Don’t do this in a dusty atmosphere. Ideally, switch lenses indoors or sheltered from the wind to avoid dust or dirt reaching your camera’s sensor. Lay your camera on its back on a soft surface, such as a jacket or kit bag, to protect your rear LCD, and so you’ll have both hands free to switch lenses. Have your new lens within reach to minimise the amount of time your DSLR’s insides are open to the elements to stop dust getting in. Use your left hand to press down on the Lens Release Button, use your right hand to turn your lens in an anti-clockwise direction and pull clear. Put the lens down to one side. Remove the dust cap from the lens mount of the replacement lens and put it on the lens you’ve just removed. Depending on what brand your camera is, you’ll next want to line up the dots on the lens and camera. For example, with Canon EF and third-party lenses, line up the red dots on the lens and camera. For EF-S lenses, line up the white squares on the lens and camera. Slot the lens in, turn it clockwise until your hear it click. Take the lens cap off your replacement lens and you’re ready to take some pictures! 04 Why are my shots blurry? Image Stabilisation (IS) is great for helping to avoid ‘camera shake’ when shooting handheld, as it enables you to use fairly slow shutter speeds to get sharp shots, but to get sharp shots of moving subjects you’ll need a fast shutter speed to freeze your subject’s movement. This counts for all moving subjects, even if they’re only moving very slightly, such as people, insects, boats in harbours, etc. The best way to control shutter speed is to shoot using the Shutter Priority mode; you set the shutter speed, and your camera will set the aperture for a sharp shot. If the lighting conditions are flat and your shutter speeds are still too slow to freeze any action in shot, then increase your ISO setting (try ISO400, 800 or 1600) to obtain a faster shutter speed – eg 1/250 sec instead of 1/25 sec. f/4 f/5.6 f/8 f/11 f/16 f/22 05 Why would I want to control depth of field? Depth of field is one of the most powerful camera effects available to photographers. Being able to decide how to direct people’s eye to certain aspects of a scene, by blurring the foreground and background, can have a dramatic effect on your results. So how do you control depth of field? With your aperture setting! This varies depending on your lens. Using a wide aperture (eg f/4 or f/5.6) captures a shallow depth of field, blurring backgrounds to help subjects stand out; conversely, a narrow aperture (eg f/16 or f/22) captures a large depth of field, keeping everything from foreground to background ‘acceptably’ sharp. Be aware that changing the aperture affects shutter speed. A wide aperture lets in more light, so you need a faster shutter speed for an accurate exposure; a narrow aperture lets in less light, so you’ll need a slower shutter speed. 06 What is an exposure? An exposure is, most basically, the image that’s captured by your DSLR’s sensor, and its ‘brightness’ is dictated by two main ingredients that you can set – aperture and shutter speed (your ISO setting will also influence your exposure, but don’t worry about ISO unless you’re concerned about shutter speeds, see below). The combination of aperture and shutter speed will determine how bright or dark your exposure appears. Bad exposure Your DSLR will take accurate exposures most of the time but, if you’re shooting dark or light subjects, it can overcompensate. If you shoot in Program, Aperture Priority or Shutter Priority mode, you can use Exposure Compensation to manually bright and darken your result. 07 Do I need to adjust ISO? If you’re using a tripod, no, leave it on ISO 100 for best image quality. If you’re shooting handheld, then ISO is your friend! By increasing it, and in turn your camera’s sensitivity, you can obtain fast enough shutter speeds for sharp shots – whether taking portrait shots in low light indoors or shooting fast-moving action subjects. The higher you go, the noisier/grainy images will appear, however, it’s always better to have a grainy image than a blurry unusable image. The latest DSLRs are getting better and better and controlling image noise; our action shot was taken in dark woods at ISO 2500. 08 What’s a good lens for indoor portraits? Using a fast prime lens is ideal for indoor people photography, as the inevitable lack of light means you’ll need a really wide aperture to let a lot of daylight reach your camera’s sensor. Using 50mm primes with really wide (or fast) maximum apertures has the benefit of capturing a really shallow depth of field for artistically blurring anything other than the focal point: in a close-up portrait, focus on the eyes (or closest eye), and much of rest of the face and background will be knocked totally out of focus. A fast lens also enables you to achieve a suitable shutter speed for sharp shots when shooting without a tripod, even in low light, plus you won’t need to resort to using flash, which can often overpower and ruin any atmospheric light. 09 What’s a good lens for garden close-ups? You’ll need a macro lens. But beware: many zoom lenses with ‘macro’ in the title aren’t really macro at all. A dedicated macro lens will enable you to take 1:1 life-size close-ups – allowing you to focus on tiny objects, such as flowers and insects, that will fill your frame. 10 Which lens do I need for landscapes? For 90% of landscape and scenic photography, you’ll want a wide-angle zoom lens to fit as much of the scene as possible into your frame. You can simply use the widest end of your kit lens that came with your DSLR – such as 18mm on an 18-55mm. However, on APS-C sensor cameras, lthe 1.6x crop factor is a disadvantage when it comes to wide-angle photography; compared to full-frame sensor cameras the ‘effective focal length’ (EFL) of an 18mm focal length on a crop sensor camera is actually (1.6x18mm) 29mm. Which isn’t very wide at all! So for APS-C DSLRs, you’ll be better off with a dedicated ‘ultra’ wide-angle lens, like Sigma’s 10-20mm f/3.5. Similarly, when it comes to full-frame cameras, you’ll find the 24mm end of a 24-105mm kit lens, for instance, is reasonably wide. But for really wide shots try the a 16-35mm wide-angle zoom. 11 What zoom lens do I need for photographing wildlife in my local park? Many people refer to a ‘zoom’ lens, when they really mean a ‘telephoto’ lens. A zoom is any lens with a variable focal length – and could be a wide-angle zoom, not just a telephoto. It’s the telephoto focal length that counts – the bigger the number the further its reach. So a 400mm lens will magnify subjects twice as much as a 200mm lens. For local wildlife, you want a telephoto lens with a focal length around 300mm or 400mm so you can shoot from a safe distance without scaring the critters off, as well as getting frame-filling shots. As explained above, if you have an APS-C camera, you need to consider the 1.6x crop factor. But this becomes an advantage when it comes to telephoto lenses: a 200mm lens on a crop sensor camera has an EFL of 320mm, and a 300mm lens has a massive EFL of 480mm! Telephoto focal lengths also capture a shallower depth of field, further blurring backgrounds. A ‘fast’ lens with a wide aperture of around f/4 will blur backgrounds beautifully to help your wildlife subjects really stand out from their surroundings. 12 How do I make water look nice and smooth? This popular landscape photography effect isn’t as difficult to achieve as you might first think. You simply need to use a very long exposure! With a long exposure (aka very slow shutter speed) any movement in shot – whether it’s people, cars, or water – will be turned into motion blur. The longer the exposure, the more blurred this movement becomes. It’s vital to use a tripod to ensure your camera remains rock-steady, and use either a cable release or the Self-timer Drive mode to ensure that the action of pressing the shutter doesn’t jog the camera. It’s also best to use Live View to compose and focus your scene (see right for setup tips), and set your ISO to 100 and the narrowest aperture your lens allows (eg f/22) to obtain the longest possible exposure. Shoot on overcast days and when light levels are lowest – early mornings and late afternoons are best. It depends on how fast the water is flowing in your chosen scene, but the longer your exposure the smoother the water will become. If your exposure still isn’t smoothly blurred enough, you’ll need an ND (neutral density) filter – this semi-opaque filter cuts down the amount of light hitting your sensor. A 30-sec exposure is about the optimum for artistically blurred water in landscape shots. Too dark 13 Why are my winter outdoor portraits so dull? It’s a common complaint. You need to get light onto your subject’s face to lighten them up. As sunlight comes from above, people often end up with shadows on their faces, or on an overcast winter’s day or shooting in the shade, there may be hardly any useful light. With a reflector The solution is to use a reflector – a pop-up reflective surface that bounces light back onto people’s faces to brighten up portraits. Alternatively, use a little ‘fill flash’ – use your pop-up flash in Aperture or Shutter Priority mode. 14 What time of day is best to photograph buildings? It’s a question of timing: which direction does the building you want to photograph face, and what time of year is it? Once you know this, you can work out when the sunlight will hit it for the best lighting – The Photographer’s Ephemeris is an excellent free resource for determining this. Towards the start or end of the day, when the sun is lower in the sky, is often best; this creates longer shadows to add depth and accentuate the shape of the structure. Sherborne Abbey, in our example shots, faces south, and so is sunlit throughout the day. Even so, shooting at the wrong time can have the sun casting a distracting shadow or ducking behind a cloud, resulting in a lacklustre shot. Selecting another angle, or waiting for a break in the clouds, can make or break a photo… 15 How do I use Live View on my LCD? We love using Live View and have been converts since it first appeared. ?It’s brilliant whenever you’re shooting with a tripod, and we use it without fail when we’re taking still life, macro and landscape photographs – it makes it so easy to frame and focus with total accuracy, as well as getting a ‘live view’, so you can adjust your exposure before you take a shot. Here’s how to get set up for Live View shooting: Step 1 To begin Live View shooting, first press the Live View button on the back of your camera, just right of the eye-piece. Make sure you’re switched to stills shooting, and not video. Step 2 Use the grid display to aid composition and the digital level for a straight shot, press Info/Disp until these appear. Zoom in/out on your lens and fine-tune your tripod for the best composition. Step 3 Place the square over your focal point. Zoom in to x5 or x10 by pressing the magnifying glass button, switch to manual focus (MF) and twist the focus ring until the image is sharp. Zoom out. Step 4 You can also read the histogram to check your exposure – press Info/Disp until the graph appears. Use Exposure Compensation to brighten or darken the shot if necessary. |